
- Details
- Category: Documentation
-
By Jane Atkinson
- Hits: 8535
File management
Uploading files for later download by a website visitor or a club member
Uploading files
Launch the Admin Console
Select File Manager from the drop down list.
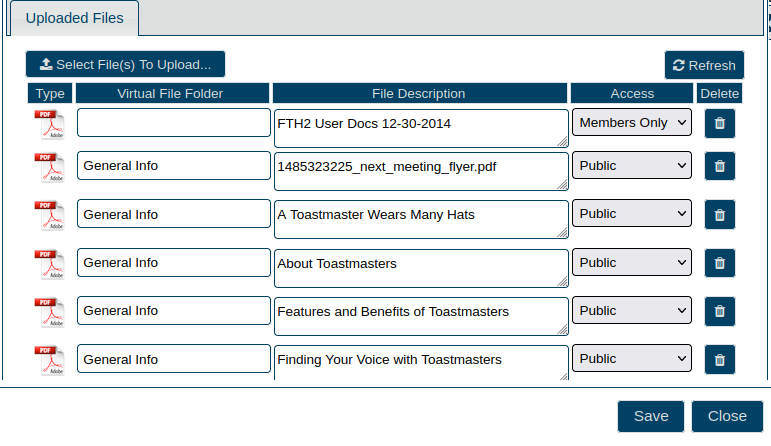
From the File Manager screen, click on the Select File(s) To Upload button and select the file(s) to upload. The files will then upload automatically.
While you can upload any number of files via the File Manager, the size of individual files is restricted to 5 megabytes or less to prevent the upload of large video or audio files. Large video or audio files require a lot of bandwidth to play and adversely impact server performance. If you want to show a video on your website, upload it to a service such as YouTube which does not impact the FreeToastHost server, then use an iframe to include the video in your web pages.
Note that you can always download a file from the File Manager by clicking on the file's corresponding icon at the left.
Renaming files
After uploading, you will notice that the file names of the files you just uploaded have been entered into the File Description field for each file—spaces are replaced with underscores.
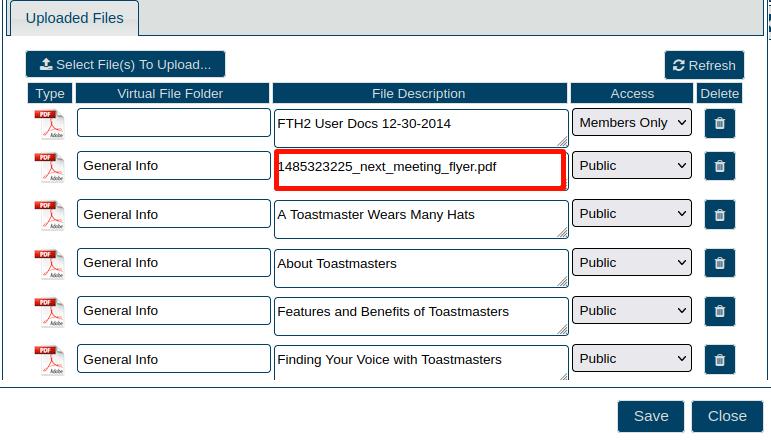
The file name in the red box probably needs changing by removing the leading numbers.
Type the new name in the box and click on the SAVE button.
If you then click on Refresh, you will see the files in the order in which they'll appear to the user.

Changing file access
There are four types of file access: Public, Members Only, Officers Only, and Hidden. The type of file access set for a file in the File Manager determines who can download a file and where the files are visible (if at all) to download them. For example, to set the file called "Next Meeting Flyer" above to be downloadable only by Members via the Member Downloads page, you would select Members Only from the drop-down to the right of the name:

By default, all files are only accessible by members when you first upload them. This means that the files can only be downloaded in the Member Downloads page, by default. To make the files available as public downloads in the Public Downloads area, click on the drop-down in the Access column and change the access to Public, then click the Save button at the bottom. You can change the access for several files at once, then click Save.
Files set with Officers Only access are only accessible for download in the Member Downloads page by a member who is an officer that has logged in. This might be useful for storing files not intended to be viewed by regular members.
Files set as Hidden can only be accessed for download via the File Manager by clicking the relevant icon in the leftmost column. This file access may be used to take files out of circulation when they are no longer relevant.
If you never plan to make specific files available for download ever again, please consider deleting them rather than just setting them as Hidden. This helps conserve available space on the FreeToastHost server.
You can change the access of uploaded files at any time via the File Manager.
Organising files in folders
You can organise your downloadable files into folders so that they are easier to find when downloading.
First, choose your folder names.
In this example, we have decided to use three folders: "FTH2 Training Powerpoints", "General Info", and "Meeting Minutes"
The folder name goes in the first field, in front of the file name.
We are putting two files in the "FTH Training Powerpoints" folder, six files in the "General Info" folder, and two files in the "Meeting Minutes" folder.
When you've made the changes, SAVE as usual. Click on Refresh if you like to reorder the files.

Note: The folder is automatically created when you put its name in front of a file. You don't need to do anything first.
If you want to move a file to another folder, just change the text in the folder field. If the folder doesn't already exist, it will be created automatically.
Important: You can't have two files of the same name in different folders. E.g. you can't have a file named 2018 Goals in Meeting Minutes and a file named 2018 Goals in General Info, or the system gets confused. Make sure that the file name is unique.
Here is how the folders look in the Public Downloads area. When you first go to the area, the folders are closed.
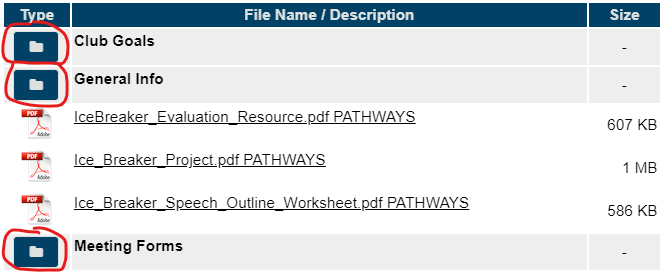
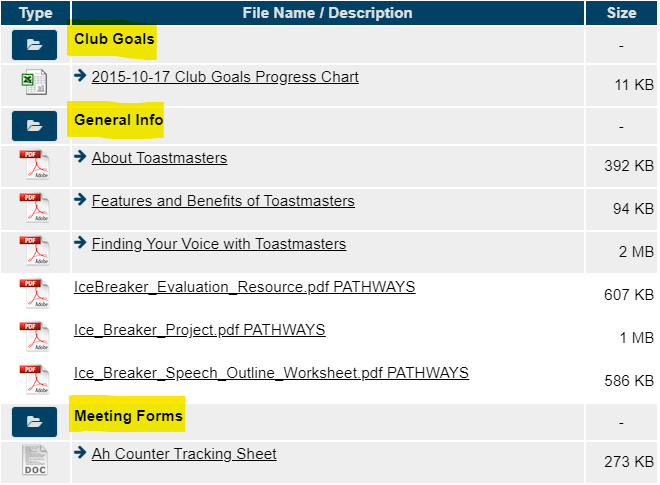
Clicking on the folder icons (circled above) opens them, showing the files. Notice how the file named "A Toastmaster Wears Many Hats" is not displayed below because it is set for Members Only Access above, which means it is not displayed in the Public Downloads page.
Click the folder icons again to close them.
This method works regardless of whether the files are set as Public, Members Only, or Officers Only. The access only determines which download area the files are displayed in and who can access them. Of course, Hidden files are only shown in the File Manager, so it does not really matter if you use folders for them.
Linking directly to a file
To link directly to a file from a page on the site, see this page.
Latest Forum Posts
-
- Sent email to members@domain blocked by FTH
- In Public Forums / Support Requests
- 2 hours 58 minutes ago
-
- HTTPS Certificate
- In Public Forums / Support Requests
- 3 hours 4 minutes ago
-
- Issue with cloudflare on contact us form preventin...
- In Public Forums / Support Requests
- 5 hours 55 minutes ago
-
- how do I know I've been approved for a website
- In Public Forums / General Discussion
- 12 hours 14 minutes ago
-
- Club 1038 email distribution lists not working
- In Public Forums / Support Requests
- 12 hours 44 minutes ago