
Printing and emailing agendas
Printing the agenda
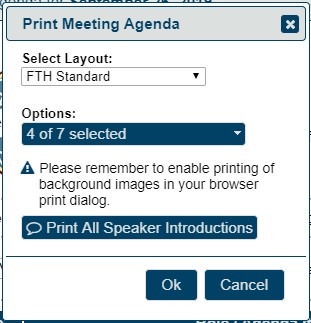
Click the printer icon on the agenda button bar.

This will open a new dialog where you can select a layout and options for printing the currently displayed meeting agenda. Once you have selected your desired print settings and click Ok, a new page will open showing the printed view and with the printer dialogue open.
Note that these settings are different from print settings that you set via your browser print dialog.
In the above Print Meeting Agenda dialog, you can select a desired print layout and print options for FreeToastHost to use to compose your printed agenda. There are currently 5 print layouts some of which are strictly Black and White versions: FTH Standard, TM Layout, TM Layout-B&W, Hybrid Layout, and Hybrid Layout-B&W. You should try print previewing the various print layouts to determine what looks best for your meeting agenda.

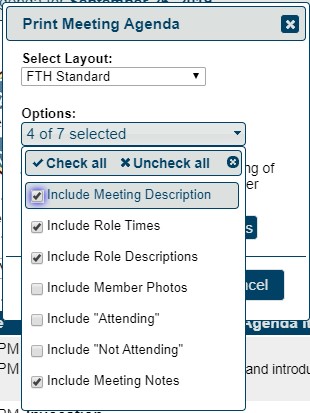
The Print Options allow you to include or omit different parts of the agenda and meeting information in your printed agenda. Keep in mind that including more features may result in using more paper and ink to print the agenda.
If you click the Print All Speaker Introductions button, a new page will display showing all the Speaker Introductions for the meeting formatted for easy printing. The print dialog will then display for you to easily print the Speaker Introductions shortly after you print your meeting agenda.
Adjusting page appearance
Your browser settings will have some effect on how the page appears when printed.
The following are worth checking:
- paper size
- paper orientation
- margins
- scaling
- shrink to page width (ignores scaling)
- browser headers and footers
- print background colours
- print background images
You can also choose to close the print dialogue and save the page as an HTML file. You can then open it in Word or other program for further editing. Additionally, your browser may provide the ability to convert the printed agenda to a PDF file. A PDF file is convenient because it keeps the formatting, but allows you to share it with others so that they can easily print it themselves.
Printing speech introductions

Look just above the speakers intro and you will see a little printer icon.
The only people who see the icon are those members that can edit the agenda. (Usually the Toastmaster, VPE, President, and Website Admin)
This icon allows you to print a single Speaker Introduction--as noted above, all of the speaker introductions can be printed at once via the Print Meeting Agenda button.
Emailing the agenda
Click on the email (envelope) link in the agenda button bar.

A subject which includes the agenda date will be proposed for the email, but it can be edited if you wish.
You can also include a personal message along with the agenda. Compose this in the edit window.
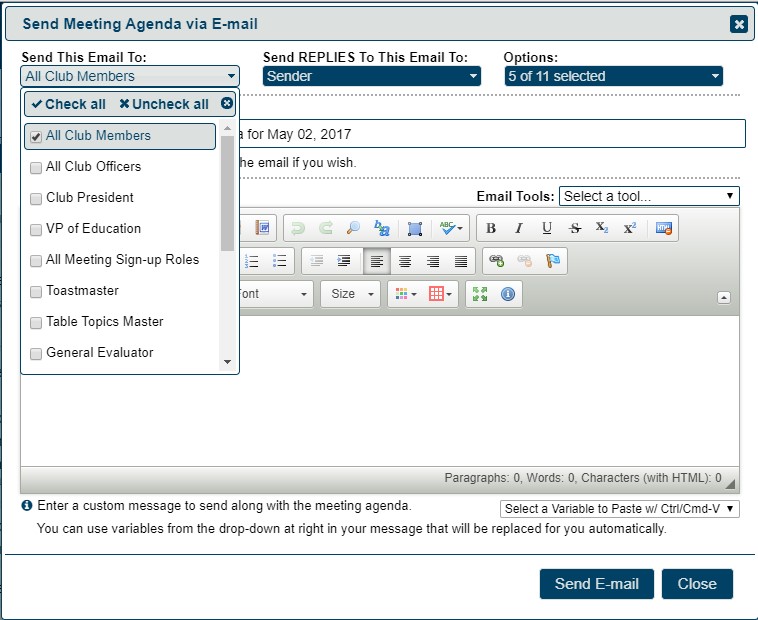
Choose recipients (first pull-down menu). The system remembers your choices but you can change them at any time.
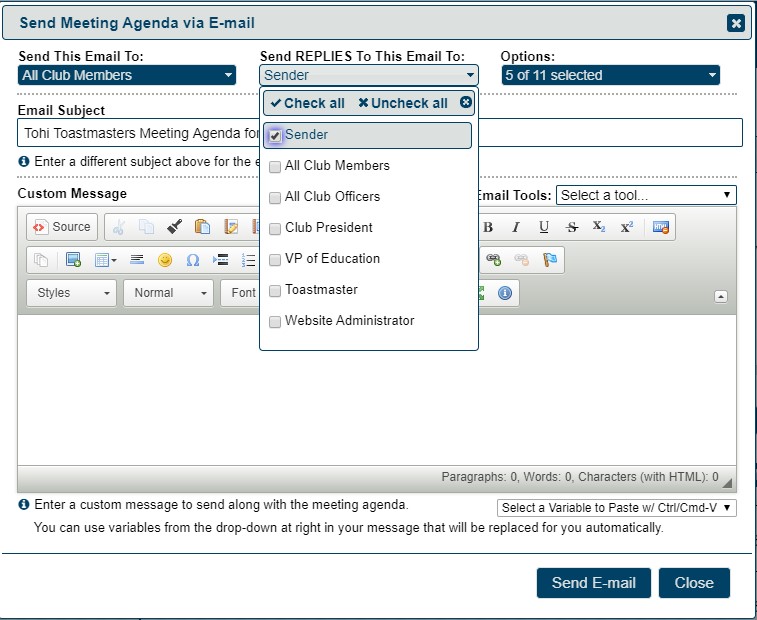
Choose who your replies go to. Before you use "All Club Members", check with your club that they are happy with this.
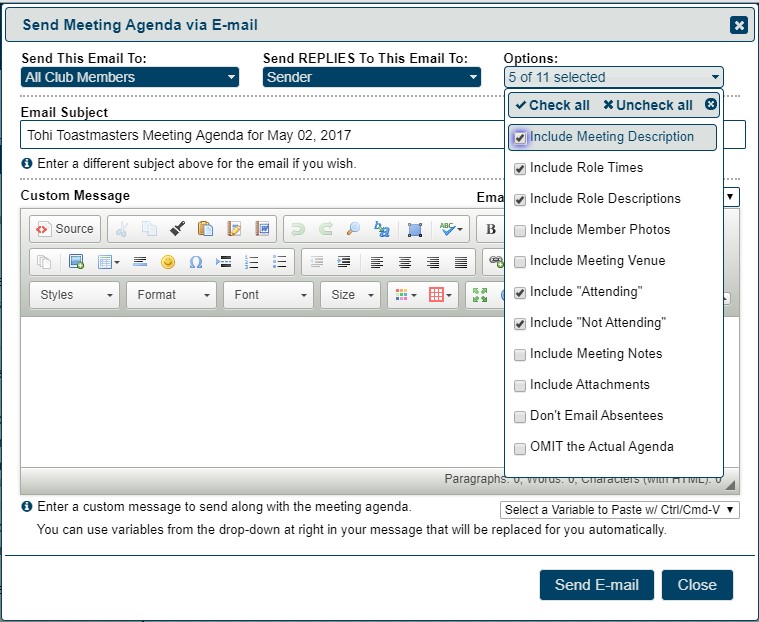
Select options. This determines what goes in the agenda email.
OMIT the actual agenda is useful for following up – you usually don't need to send the whole agenda again.
Selecting Include "Attending" and / or Include "Not Attending" prints a summary of those who have confirmed that they are (or are not) attending.

FreeToastHost inserts buttons and links in your agenda email to allow recipients to "respond" to the email. For instance, this lets them sign up for meeting roles right from the emailed agenda. To learn how these "Response Links" in an emailed agenda work, see http://support.toastmastersclubs.org/doc/item/responding-to-emailed-agendas
Email Variables
The Email Variables drop-down allows you to select variables to insert into your message that is sent with the agenda. The system will replace the variables with the corresponding values as it emails out the agenda. For instance, inserting the {{name}} variable allows you to "personalize" your message by including each members name in the message sent to them.
Email Tools
These allow you to use templates and signatures.
See separate Email Tools document.