


- Details
- Category: FTH4
-
By Richard Taylor
- Hits: 497
Dues Management
Treasurer and access to the Dues Management Module
The Dues module is a way for club treasurers to email dues invoices, keep track of who has paid, the payment method used, and to follow up with those who haven't paid yet.
It is NOT an accounting package, and does NOT link to TI member payment information.
The FTH dues system functions by defining key elements (Dues settings) that are common to the club. During each Toastmasters dues cycle, the club treasurer creates a new FTH dues cycle to track member payments.
The Treasurer and the Club Admin have access to this module by default. Other officers can be given access to the module if the club wishes.
Access the module by selecting it from the 'Club Tools' section of your Dashboard.
If you are the Club Admin, you'll find it in the the 'Officer Centric' section of the Admin Console.
Before you use the function for the first time, you need to customise it.
Step 1a - Select 'Dues Settings'
You are asked to fill in some settings that apply to your club.
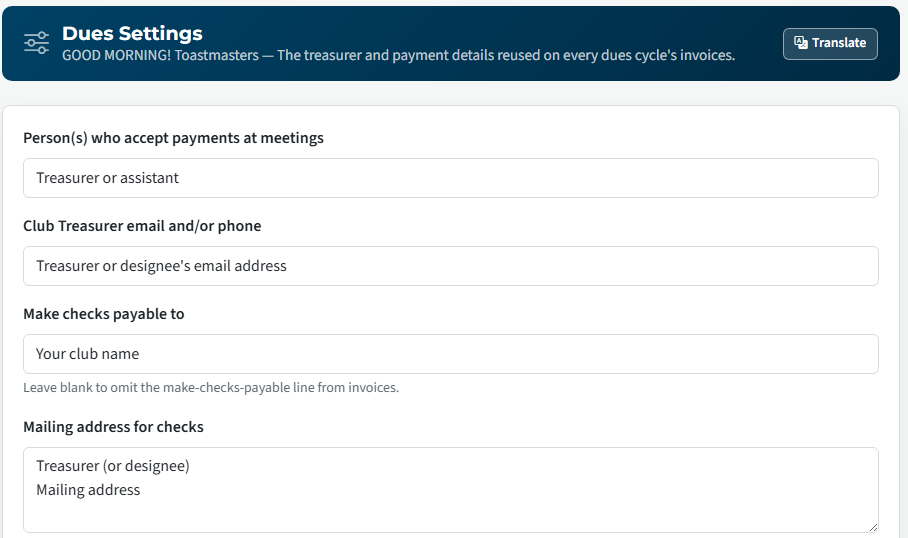
You have quite a bit of flexibility with the field contents. For example, if you set the person who can accept checks at the meeting to be "Mary, or in her absence, Mei".
Step 1b - Payment Methods
Add payment links as desired. Note the instruction immediately below the 'Online payment links' box.
If your club uses PayPal see the PayPal Button page for details about getting the link from your PayPal account.
If you don't use Online payment methods, just leave the box blank and nothing will appear on the invoices. The same applies to Direct Deposit.
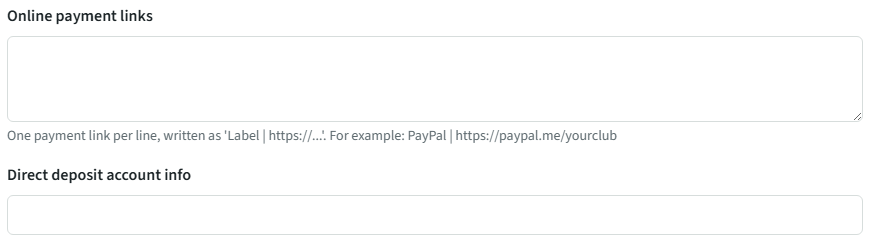
Step 1c - Invoice opening & closing message body
Finally, set up the body of your notices to read the way you want it to. If you use the variables in double braces, e.g. {{name}}, the values will be automatically inserted into the email when it's sent.
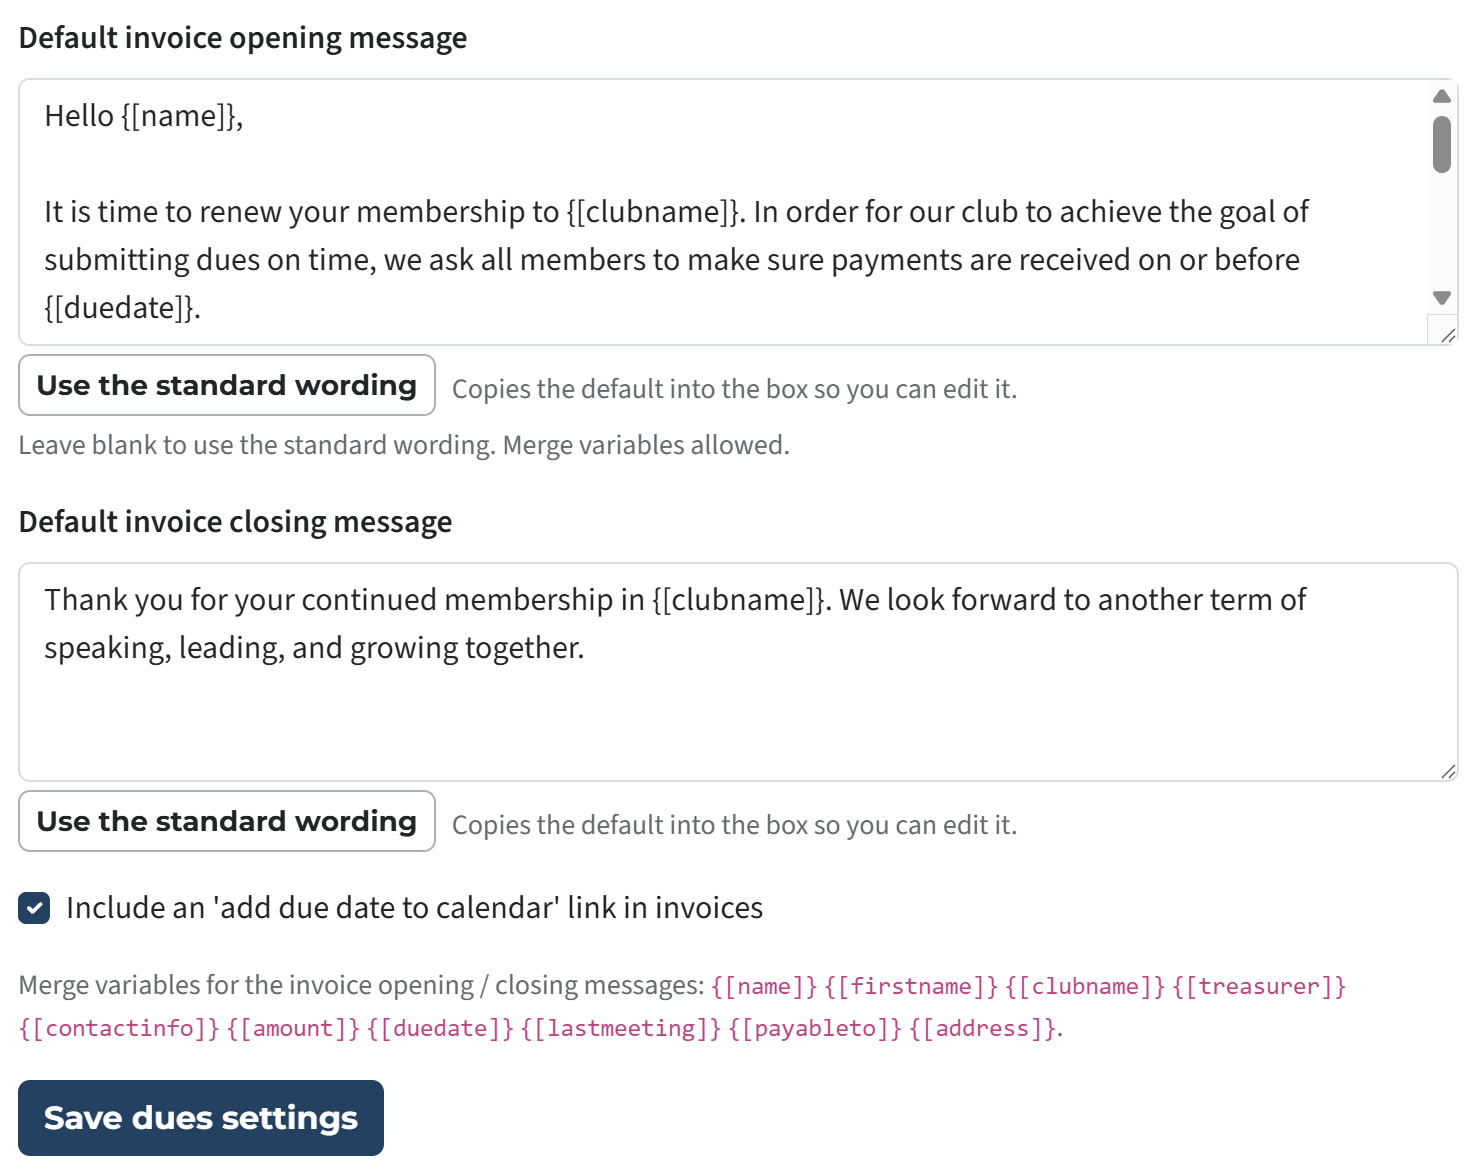
If selected (as in the image above), the "Include an 'add due date to calendar' link in invoices" check box adds options for members to add the due date to their calendar. This appears at the end of the email (see screenshots later in this doc).
Copy and paste "Merge variables for the invoice opening / closing messages:" into your messages as needed.
If you think you've made a complete mess of your message body, select 'Use the standard wording' to restore the system default message. Then you can try again.
Once you are happy with your dues settings click the 'Save dues Settings' button.
Step 2 - Proofread your invoice preview
Now it's time to see if your message and invoice looks the way you want it to. Click on the Dues Settings tab to preview the invoice and scroll to the bottom of the page.
The first part is the message body. Be sure to use either the {[name]} or {[firstname]} variables so that the member's name will automatically be inserted when the email is sent.
Note; Invoice previews are also available in the Dues cycle. (Step 3 below)
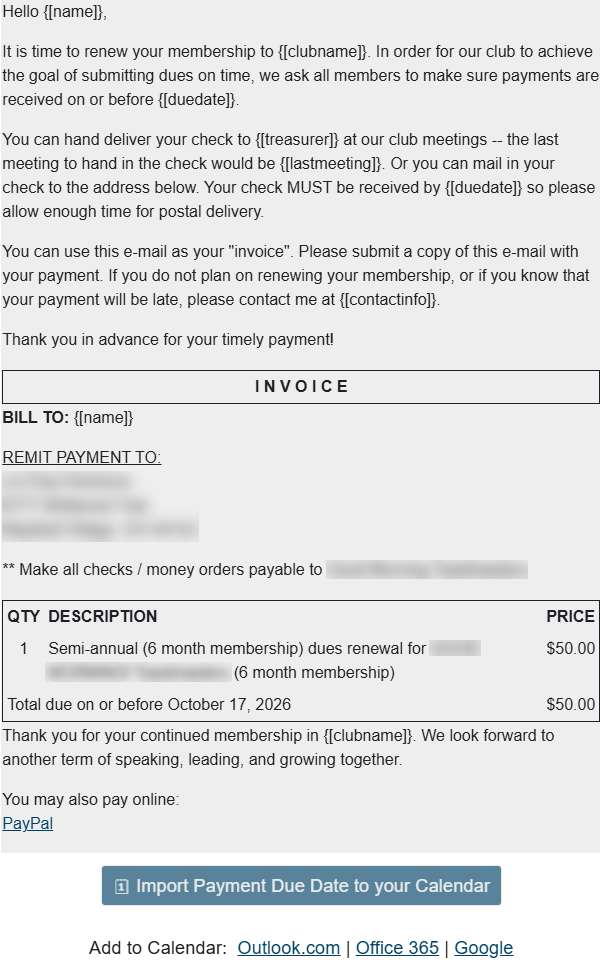
The large calendar button allows members to download a calendar (.ics) file. This is a small text file which the recipient can then import into their device calendar.
IMPORTANT: You can go back to the Invoice Settings tab and make changes if you wish. If you do, you MUST save them before proceeding to the next step.
Step 3 - Create a dues cycle
Click on the 'New dues cycle' button.
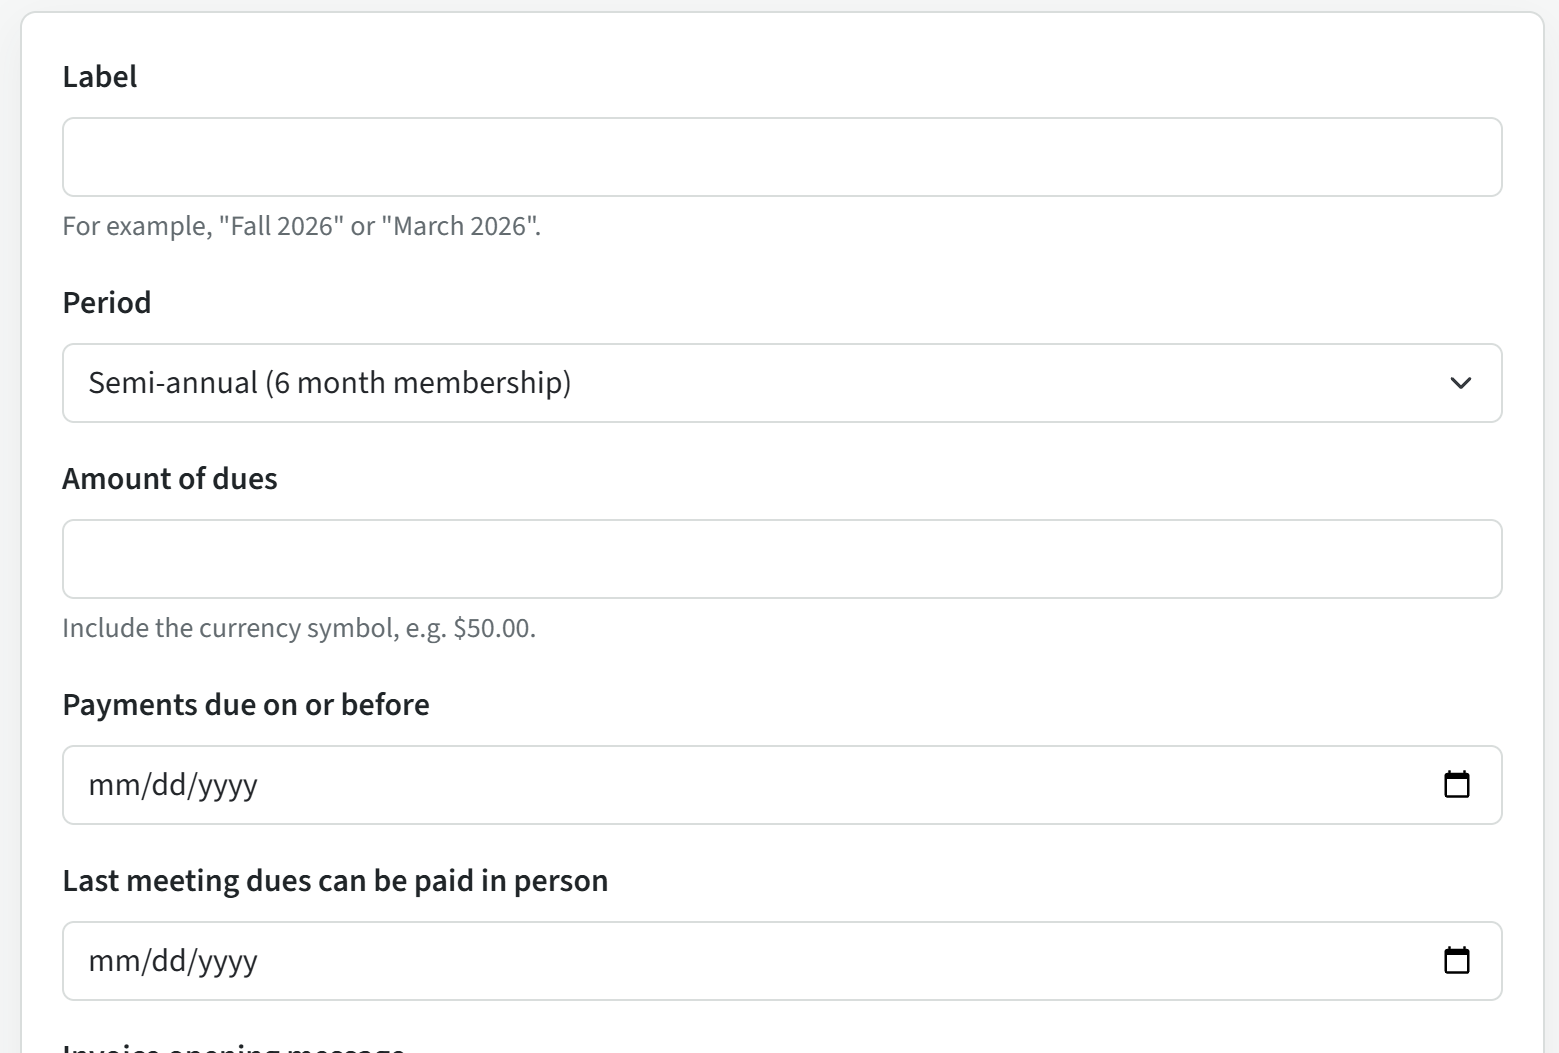
Complete all the boxes from 'Label' to 'Last meeting dues can be paid in person'.
Optional; customize the opening and closing messages for this dues cycle. Do nothing to use the messages saved in the Dues Settings.
When satisfied with the information you entered click 'Create dues cycle'.
The invoice preview can be see here as well.
Step 4 - Manage the dues cycle
Open the dues cycle to view the list of club members and make the appropriate adjustments.
Each time the Dues Cycle is opened the members who have a check in the SEND column (left of their name) is controlled by one of two conditions. The following will not have a check in the SEND column.
- Members with a check in the PAID column.
- Members with a check in the NOT RENEWING column. Be sure to know who is not renewing and check this column before sending invoices.
Ensure that ONLY the members to whom you wish to send or re-send an invoice have the SEND box checked. Checking PAID will uncheck SEND and unchecking PAID will re-check SEND.
As payments are received, check the box in the 'PAID' column, record the method that a member used to pay and any pertinent notes. This information remains in the dues cycle.
IMPORTANT! The Save Tracking button at the bottom of the page must be used each time a change is made to a member's PAID, NOT RENEWING, PAYMENT METHOD or NOTES, even if you are not sending notices on that particular dues cycle update.
You can test your settings by sending an email to yourself.
Here's a sample final email:
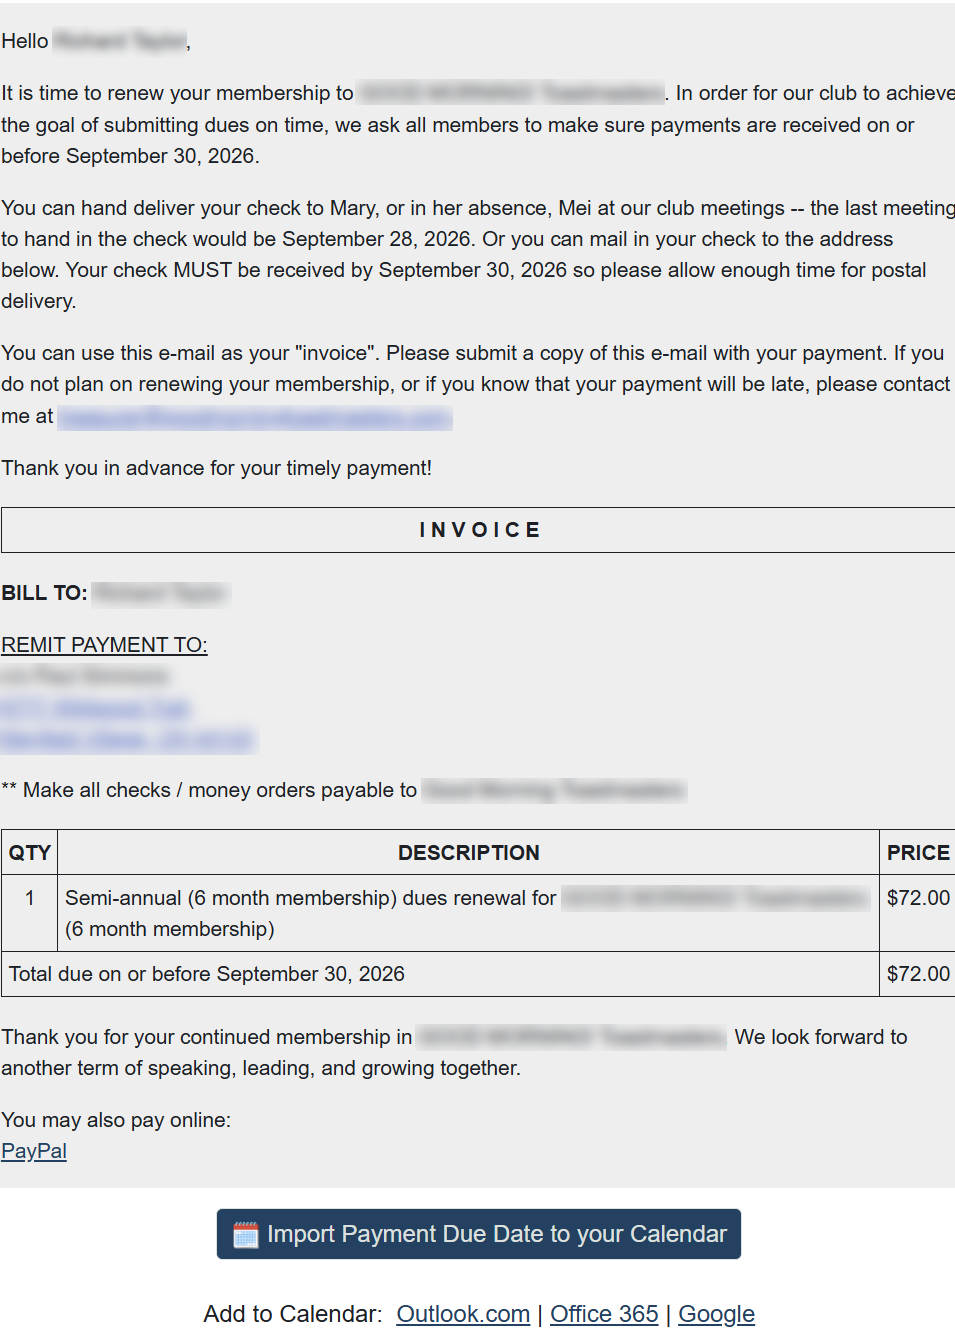
If you're happy with this, it's time to check the other box at the bottom: Save & send notices to checked.
Step 5 - follow-up
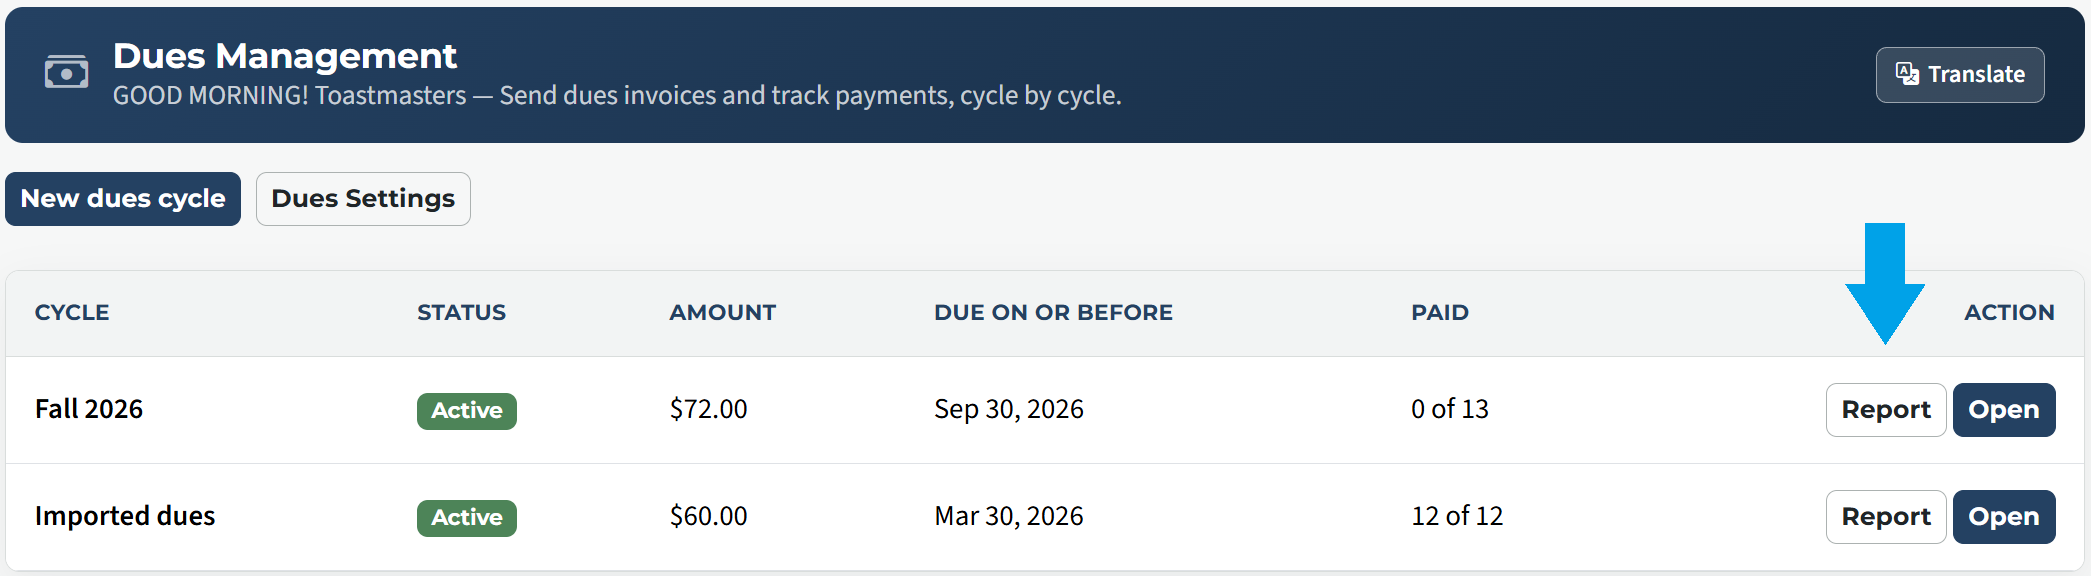
On the Dues Management Page click the 'Report' button for the dues cycle for a printable report of the clubs paid/unpaid status. This is useful for taking to club meetings for following up in person.
In the Dues cycle select the 'Follow-up' tab. Here you can send a follow-up email to two groups of members;
- Members who have NOT paid
- Members who HAVE paid
To re-send an invoice, use the 'Send Notices/Track Payments' tab and select the box to the left of the appropriate member names. (Step 4 above)
If you need to use CC or BCC, or add an attachment you must send follow-up emails from your regular email client.
May you all be successful in collecting your dues on time and getting the DCP point for your club!
Updated 07 August 2026

Latest Forum Posts
-
- Live timer sheet
- In Public Forums / FTH4 Support
- 11 minutes ago
-
- FTH Emails Not Going Through
- In Public Forums / FTH4 Support
- 14 minutes ago
-
- Not able to open club web site
- In Public Forums / FTH4 Support
- 21 minutes ago
-
- Members's input attending is not saved in Attendan...
- In Public Forums / FTH4 Support
- 24 minutes ago
-
- Could someone please reset our FTH web site?
- In Public Forums / FTH4 Support
- 1 hour 13 minutes ago