

- Details
- Category: Documentation
- By Jane Atkinson
After you add members, you will want to let them know what to do next. You can use our default welcome e-mail, or customize your own.
Click on the New Member Welcome tab to access this message.
Here is what the default looks like:
Hello {{membername}}:
Welcome to the {{clubname}} club website. The URL (web address) of this website is
{{WEBURL}}
You have been setup as a member of this website. As a member you can sign up for roles, update your profile including social media links, your photo, and other information, download member only files, sign up as a mentor or offer to mentor another member, and more.
To login, visit the club website and click the "Member Login" link under the "Members Only" section. If this is your first time logging in as a member, or if you forgot your password, you leave the password section blank and click the "Authorize / Login" button. You will be sent a login link via e-mail. Click that link, then you will be prompted to set up a custom password. This is a password that *you create*, it has not been assigned.
If you have any questions, let me know!
Thank you and enjoy our club website!
-----------------------------------
{{adminname}}
{{clubname}} Website Administrator
Notice the variables surrounded by the double braces {{}}. These are replaced with the value of the variable during the mailing process.
You can change the content of this message. If you want to discard your changes and start again, click on the "Reset Welcome Message to Default" button.
You can send the message to one or more members. Click on the "Select New Members to Welcome" button and check the names you wish to send to. Clicking on Save at the bottom of the panel will send the message.
You can test the email by sending one to yourself, to make sure that the variables work as expected.

- Details
- Category: Documentation
- By Jane Atkinson
FreeToastHost websites run on secure connections established by using https and secure certificates. The idea is to make sure that information can't be read while it's in transit between the website and your computer.
Please note that this is about the state of the connection only. It's still possible to send untrustworthy information over one of these connections.
https is virtually a requirement these days, but there are still some http (non-secure) sites out there, and the following information may still be useful.
Modern browsers will give a warning in the location bar if you access a site over an open or unencrypted (http) connection.
These two images are from Firefox and a Chrome-based browser.
![]()
![]()
Modern browsers will also give warnings when you try to enter a password into a webpage which uses plain http. These two screenshots are from the same two browsers.
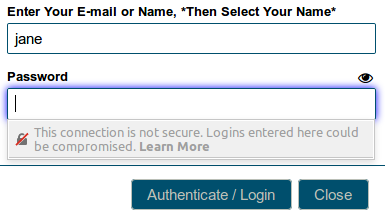
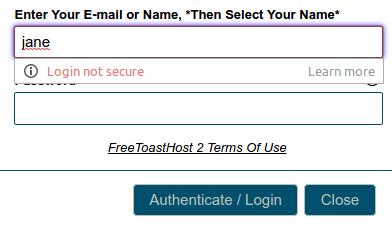
You may also get a warning if the website contains mixed content. In this context, it means a mixture of "secure" or https content and plain http content. Many modern browsers may refuse to display the http content at all. This means that you'll see blank areas instead of the image or other content.
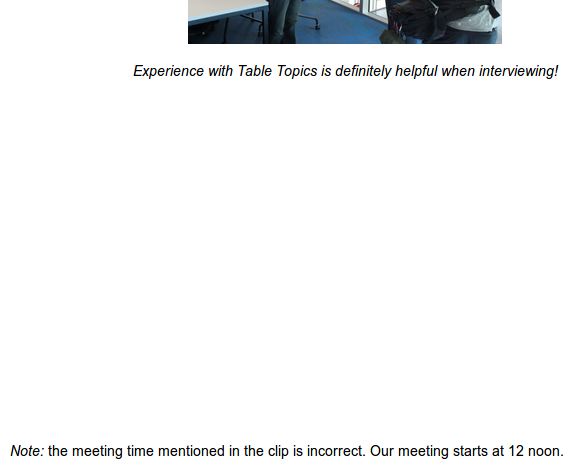
This is a YouTube link using http, leaving a blank area in some browsers.
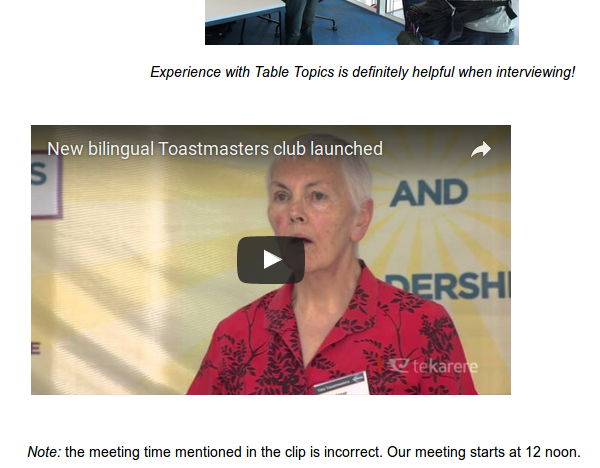
This is the same page, but with the YouTube link set to https.
If you use the WYSIWYG editor to insert images, you won't have a problem. (It uses a "relative" form of the link, "/imageuploads/clubnumber/imagename", which works equally well with http and https.)
You are more likely to have problems with content imported from other sites. Examples include images hosted elsewhere, and embedded videos and iframes where content from another site is displayed directly in a window in your own site.
In this image, the link begins with https (circled in red) and it displays correctly when the site is accessed over a https connection.
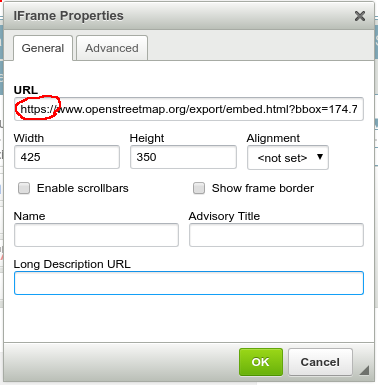
If you are finding blank areas in your site where items are refusing to display, check the pages carefully for http links and change them to https.
In a few cases, if the site you're linking to doesn't use https, you get a error message and the content still won't display. Unfortunately, there's not much we can do about that.
A http link to another site in your public or members-only menu isn't affected by these limitations and should work without any problems.

- Details
- Category: Documentation
- By Jane Atkinson
Mentoring is an important part of the Toastmasters programme. FreeToastHost provides a system for keeping track of mentoring assignments and notifying members when assignments have been made.
To access the mentor assignment area, choose "Assign Member Mentor(s)" in the Members tab of the Membership Management screen.
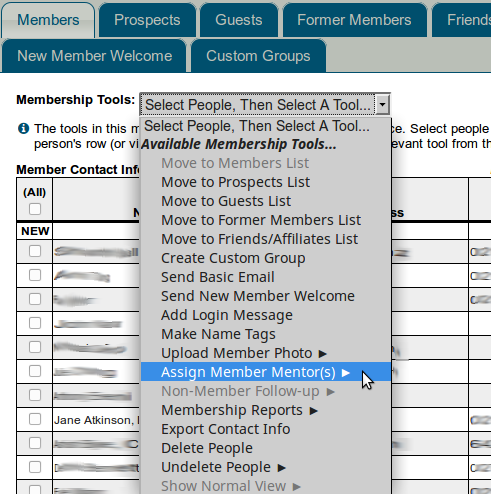
If you have been assigned special access to the Mentors area, you'll be able to access this directly from the Members Only menu when you are logged in.
Assigning mentors
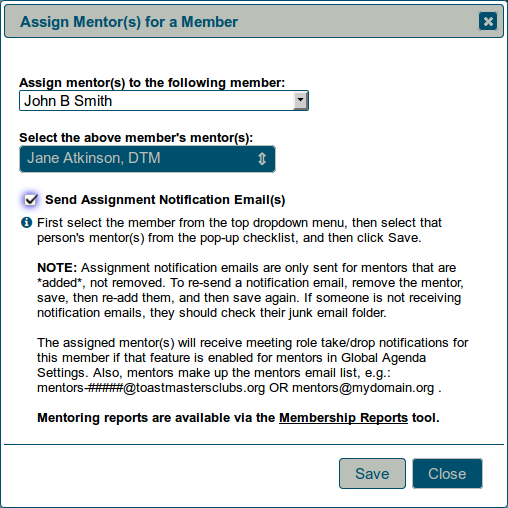
Select the mentee from the list of members.
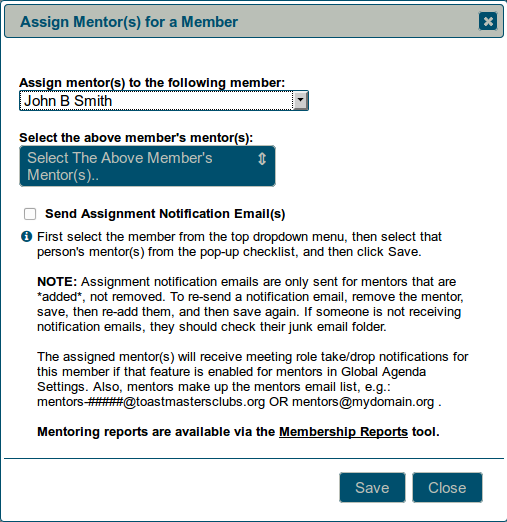
Select one or more mentors from the pull-down list.
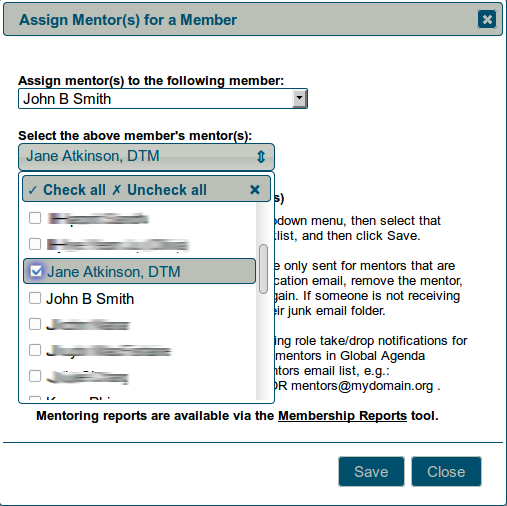
If you want to notify the mentee and mentor(s) of the new assignment, check the box before saving. Emails will automatically be sent to mentee and mentor(s) when you save.
Removing mentor assignments
After you have selected the mentee, click on the mentor pull-down list and remove the checkmark from one or more mentors. Save as usual.
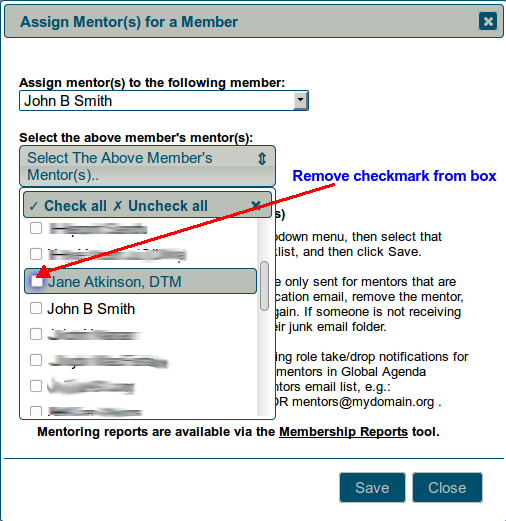
Note: Emails will not be sent when mentor assignments are being removed.
More Articles …
Page 29 of 30


