
- Details
- Category: Documentation
- By Jane Atkinson
- Hits: 16256
Adding and editing page content
How to add images, link material from other sites, and more
How to use the WYSIWYG editor
The editor is a window, rather like a word processor built into your website, which lets you edit text without needing to know HTML code.
There's a very comprehensive user guide at https://ckeditor.com/docs/ckeditor4/latest/examples/index.html.
If you want to actually experiment with the editor without fear of doing any damage, there is an online demo at https://ckeditor.com/ckeditor-4/demo/
Other languages
For page content you can use a language other than English that is supported by the UTF-8 character set. This includes languages using non-latin characters.
There may be slight differences between computers, depending on their age and the software used.
Special web page variables
You can add web page variables to your document. For example, you can have a variable that displays the next meeting date, which means you don't need to remember to update the page after each meeting. See the separate Web Page Tools page for details.
Using your own images in pages
Start by creating your image locally (on your own computer) and make sure it is sized correctly – the size you want it to appear on your website.
To Upload Your Own Images
1) Click the "image button" on the editor. It is the one that looks like an outdoor photograph (under the "Source" button)
![]()
2) The "Image Properties" window will pop up. Click the "Upload" tab.
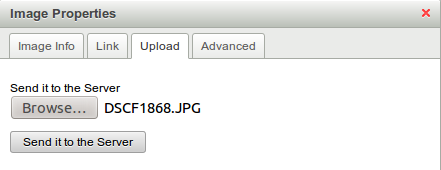
3) Click the "Browse" button, select your gif, jpg, or png file, then click the "Send It To Server" button. You will get a success message when completed.
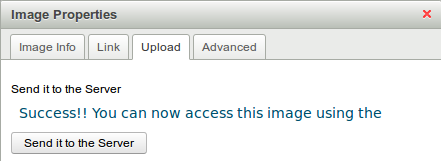
4) Click the "Cancel" button to close that window. Now the image will be in your custom image library, ready to insert.
To Insert Your Own Images
1) Place your cursor where you want the image to be inserted.
2) Click the image icon.
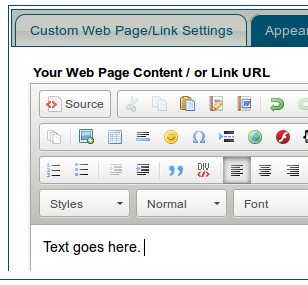
3) Click the "Browse Server" button.

4) The image library window will pop up and your custom image pane will be open by default. Click on the image you want inserted, the window will close, and your image will be inserted.
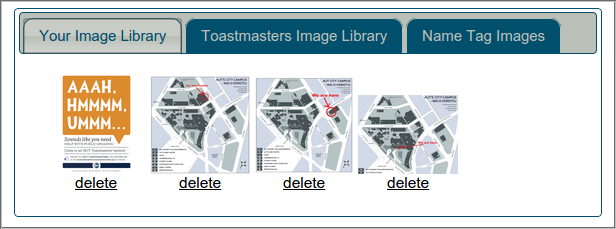
(Note: to insert an image from the stock "Toastmasters Image Library", just click on that tab, then click on the image you want to use.)
Adding images using drag and drop
The above upload procedure still works, but you may find it easier to drag an image from your computer desktop or file manager and drop it into the editor. The image is uploaded for you. Then you can proceed to resizing and positioning your image as described below.
Unless you are using Firefox, you can't yet copy and paste an image into the editor from your computer desktop or file manager. You can, however, copy and paste from other sources.
Resizing and positioning images
Once your image has been added to the page, you may wish to change its size, put a border around it, and/or position it to the left or right of the page and have text flow around it.
Click on the image and then on the image icon in the toolbar (arrowed in the first image above). A dialogue box comes up.
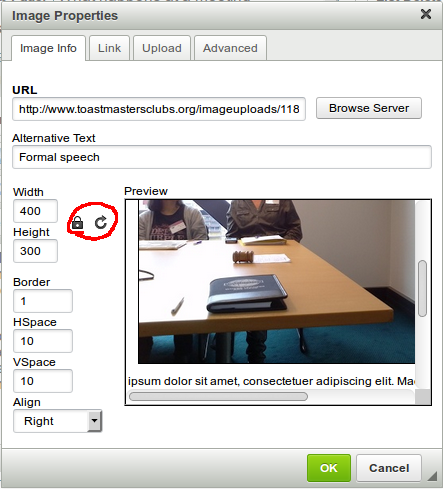
If necessary, click on the Image Info tab.
To resize the picture, make sure that the lock (inside the red circle) is closed before doing anything else. Click on it if necessary. Then type either the width or height in the appropriate box.
You would only have the lock unlocked if you are deliberately wanting to distort an image.
If you've already distorted your image and want to start over again, click on the reload icon (circular arrow - also in the red circle) to reset. Then resize as described above.
If you would like the size of your image to automatically adjust for various screen sizes (e.g. viewable on mobile phones), then enter a percentage (e.g. 80%) for the width, but leave the height blank. Your browser will automatically resize the image for various screen widths without distorting the image.
If you want a border around the image, enter the required border thickness (in pixels) in the border box. If you're not sure, use "1".
The HSpace and VSpace define the gap (in pixels) between the picture and the text, in the horizontal (HSpace) and vertical (VSpace) directions.
Align gives you a choice of having the picture to the left or the right of the text, with the text flowing around it, or not set. Not set means that the text will not flow around the picture.
If you want a centred picture, make sure that it's in its own paragraph, and then set text alignment to centred.
Important: Please enter something descriptive in the Alternative Text box, to help those who are unable to view the image. In addition, Google considers this to be an important feature when ranking pages.
To quickly and easily rotate and replace images, see the separate Web Page Tools page.
Removing images
Important!
When images are no longer needed, ensure to remove the image from your page first THEN delete it from your library.
Otherwise, your browser will try to display an image that does not really exist. This may cause your website to load very slowly or not at all. You may need to ask an admin to reset your website in this case. This is an especially bad situation to be in on the day of a club meeting.
Linking to Contact Us page
See https://support.toastmastersclubs.org/doc/item/contact-forms Creating a link to your form (about two thirds of the way down the page).
Linking to other sites
See https://support.toastmastersclubs.org/doc/item/links-to-other-sites
Doing it this way takes users to a completely different site. If you'd prefer that they stay on your club website, see the next section.
Incorporating material from other sites
You can do this by creating an IFrame. This is a special window in which material from the other site will appear. The user does not need to click on a link and they will not be taken away from your site. Google maps are a common use of IFrames.
To insert an IFrame you can use the IFrame tool. Click on the ![]() IFrame button:
IFrame button:
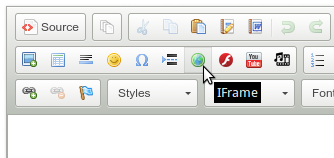
Then enter the details in the window.
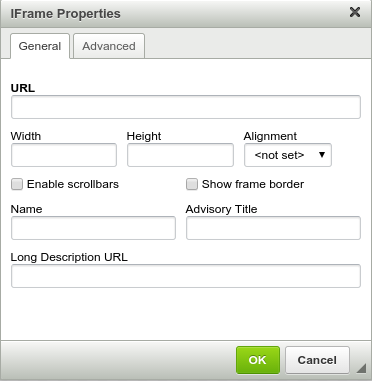
The height and width figures define the dimensions of the frame. You may need to experiment with them to get the effect that you want.
You won't see the content of an IFrame when you are editing the page, only a rectangle of the relevant size.
Once you have finished editing, save and close. To see the final effect, choose the page from the menu.
Google ranking
For the basics on doing well in Google search, see https://support.toastmastersclubs.org/doc/item/improving-google-ranking
For further information from Google itself, see https://www.google.com/webmasters/docs/search-engine-optimization-starter-guide.pdf
Do remember, though...
Google is only one way that people find your website and your club. Don't rely on it to the exclusion of other methods. For example, you might find that most of your contacts are word of mouth, or come from a link on your District site.
How to find out? Ask visitors where they heard about you. Then put most of your efforts into making sure that these things are working well.
Latest Forum Posts
-
- How to Recover Deleted Club Pictures from Server??...
- In Public Forums / Support Requests
- 1 day 57 minutes ago
-
- Trying to log in as the site administer club 4911...
- In Public Forums / Support Requests
- 1 day 10 hours ago
-
- Garbled character in emails related to FTH page
- In Public Forums / Support Requests
- 1 day 10 hours ago
-
- duplicate emails
- In Public Forums / Support Requests
- 1 day 12 hours ago
-
- Member unable to login after opting in
- In Public Forums / Support Requests
- 1 day 14 hours ago

