


- Details
- Category: Documentation
-
 By Jane Atkinson
If you are using Internet Explorer and find that you can't login or stay logged in, you probably need to change your cookie settings.
These instructions are for Internet Explorer 9 on Windows Vista. Other versions may have slightly different details but the general idea should be the same.
Select Internet Options from the Tools (cog-wheel) menu.

Click on the Security tab at the top of the popup window and check that the security level is set to Medium-High. This is the usual default.
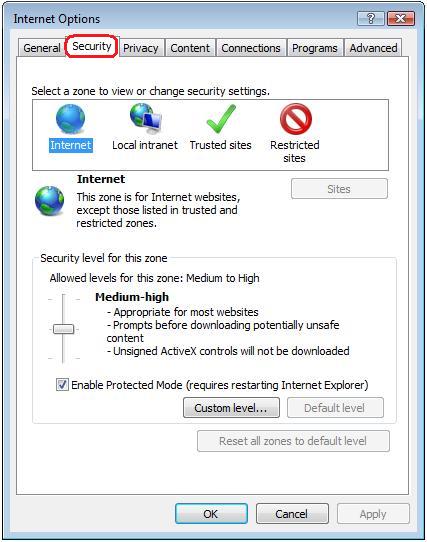
If the settings are different and this is a work computer, your IT department may have set it up that way. Talk to them before you change anything.
Then click on the Privacy tab

Click on the Advanced buitton.
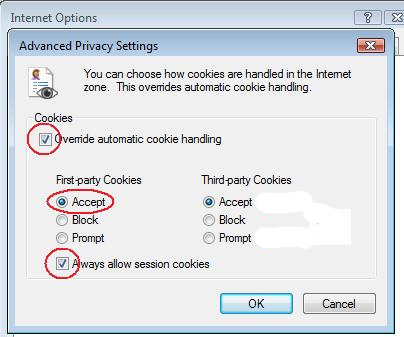
Set the options as shown:
- Override defaults
- Accept first-party cookies
- Always allow session cookies
- If you are using a custom domain, you must also set Third-party Cookies to either Accept or Prompt.
Click OK.
Click OK in the Privacy settings window.
- Details
- Category: Documentation
-
By Jane Atkinson
To create a link to another site, go to the Custom Webpages area, Create New Page.
Enter or copy the URL of the link in the Edit window.
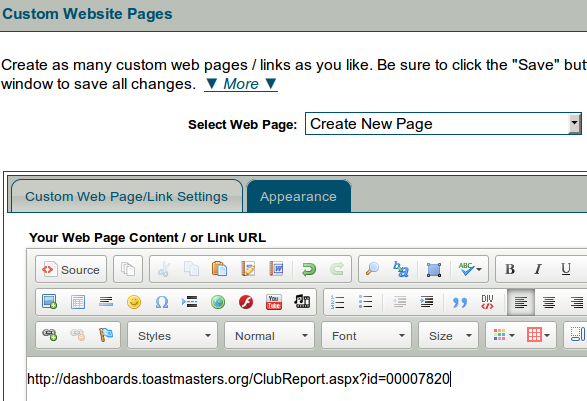
Enter the name of the link in the Web Page Title / Link Title field. This is the text that will show in the menu on the left side of the page.
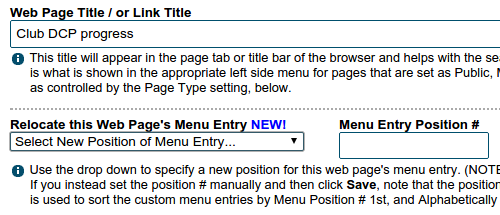
Menu Position # is optional. It controls where your link appear in the menu. The larger the number, the further down the list the link appears.
You can also change the link position by using Relocate this Web Page's Menu Entry
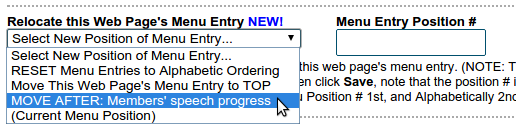
The widget works for links, even though it refers to them as web pages.
Select which menu you want the link to appear in.
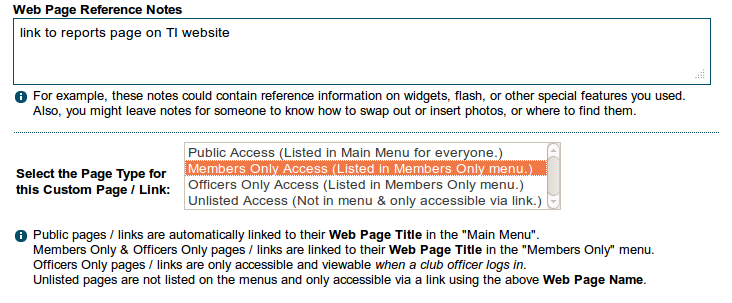
If you wish, include a note about the link. This may be useful for the next webmaster.
Important: DO NOT enter any text in the Page name, Description or Keywords fields. These are for pages only, and the presence of text will confuse the system into creating a page, not a link.
SAVE when you've finished.
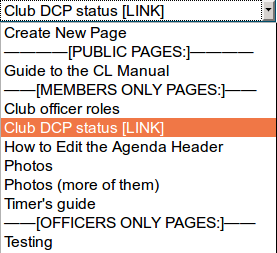
Your link will now appear in the list of pages, but will be labelled [LINK]. It can be edited later if the URL changes.
Search Keywords: Custom Links, Webpages, Menu Position, Link Title
- Details
- Category: Documentation
-
By Jane Atkinson
Accessing meeting reports
To access reports, click on the Report icon (circled).

Use the pull-down menu to select the type of report you wish to run.

Select the date range. The default is the current Toastmasters year. If you are the admin or an officer with agenda access, select the name (or "all").

The View Report Basis popup shows you a summary of what will be included in the report. You can make adjustments to the start date if necessary before running the report. You may also request that your VPE reconcile agendas where possible.
"Reconciling" means that the online meeting agenda has been updated by the VPE, Toastmaster, or other person designated by your club after the meeting to reflect who actually performed each meeting role and that the online agenda was marked as reconciled. Reconciling agendas is important to ensure that role reports are accurate.

Clicking on the run/download button (see previous image) will create a file for downloading if it's a spreadsheet report, or it will create a new page in your browser which you can then print.
Who can access reports?
Admin and officers with agenda access rights can access everyone's role reports.
Individual members can access their own information and no one else's.
Printing signup sheets
This allows you to print a page with roles down the left-hand side and future meeting dates across the top.
To access it, click on the clipboard icon in the agenda button bar.

It will open a new page in your browser with the printing dialogue box open.
The next five meetings are shown.

Members who have already signed up will have their names included on the sheet.
You can choose whether or not to include the "Not Attending" row by checking or unchecking the box.
The "Check/Un-check ALL" box allows you to include all upcoming meetings in the signup sheet.
In addition to the web page (html) version, you can also use Excel for your signup sheets.

There are two versions of the Excel sheet. One uses a list down the left-hand side of the page; the other uses a grid.
Page 19 of 29
Latest Forum Posts
-
- Need SuperAdmin to change my purchase dates of pat...
- In Public Forums / FTH4 Support
- 37 minutes ago
-
- Modify or hide small club name between "Banne...
- In Public Forums / FTH4 Support
- 2 hours 35 minutes ago
-
- Club No. 1250 - Need to Edit our Club's Website
- In Public Forums / FTH4 Support
- 3 hours 8 minutes ago
-
- Club #6494 - Cedarbrae
- In Public Forums / FTH4 Support
- 3 hours 10 minutes ago
-
- The Admin-Entered Attendance (absent or excused) n...
- In Public Forums / FTH4 Support
- 5 hours 16 minutes ago