

- Details
- Category: Documentation
- By Jane Atkinson
- Hits: 5162
Emailed agendas may contain signup buttons for vacant roles, links for confirming whether or not you'll be at the meeting, and buttons for confirming or dropping a role that's been pre-assigned.
Which of these you get will depend on how your club has the website set up, and what the sender has chosen to include in the email.

Signup and confirm / drop buttons are immediately under your name or picture.
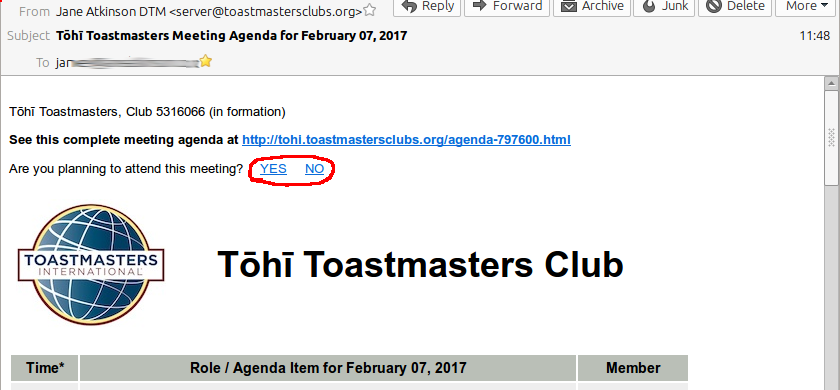
Attendance confirmation links (circled) are just above the agenda header.
If you don't have the MAILTO link option selected in your Member Profile (see here), when you click on any of these, you'll be taken to a screen asking you to enter your password. Entering your password then allows the agenda on the website to be updated.
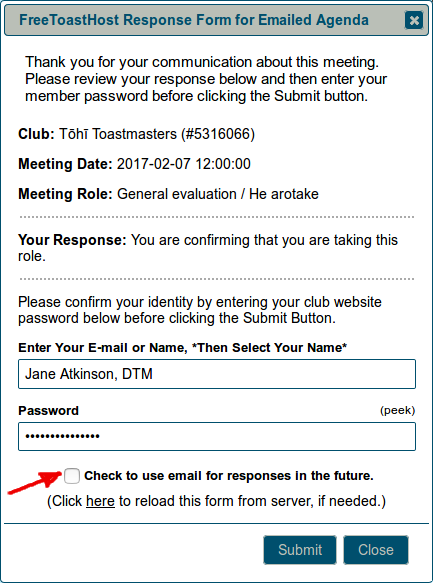
If you'd like to enable MAILTO links – meaning that you can respond by email in future and not use passwords – check the box (arrowed) before clicking Submit.
You'll see the following screen:
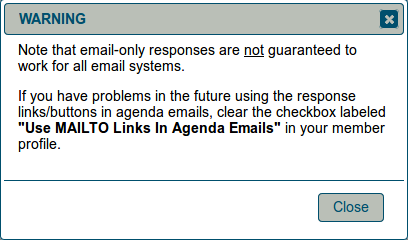
There are a few email systems and clients that don't work well with MAILTO links. If yours is one of them, you can remove the setting in your Member Profile.
If you have enabled MAILTO links in your profile (BEFORE the agenda was sent to you), when you click on a button or link, a new email will open in your email client.
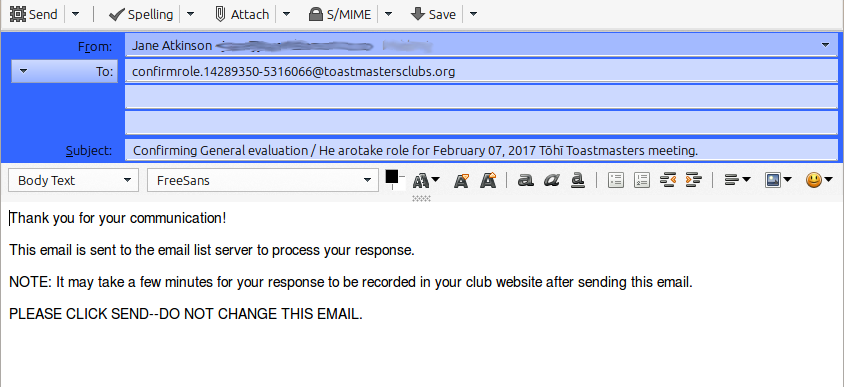
Just leave everything like it is - you do not need to change anything - and send.
You'll get a reply, usually within a few minutes, to confirm that your changes have been made.
Note: If someone else has taken the role you are requesting since the time that the agenda was emailed, you will receive an email back stating that. In that event, you can use the link in the original agenda to request an updated agenda be emailed to you or you can just take a different role in the original agenda email.
You can also use the agenda signup buttons in the same way, to take on a new role.

- Details
- Category: Documentation
- By Jane Atkinson
- Hits: 183
Mentoring is an important part of the Toastmasters programme. FreeToastHost provides a system for keeping track of mentoring assignments and notifying members when assignments have been made.
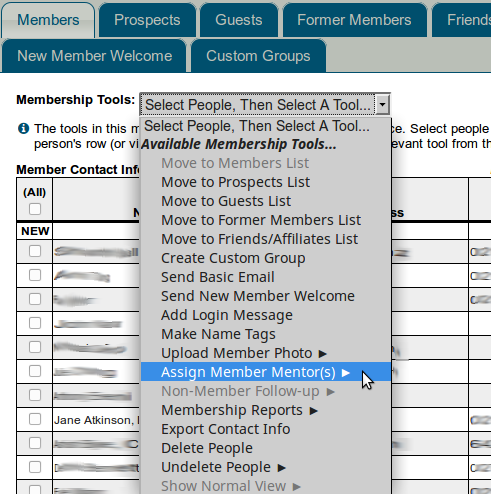
To access the mentor assignment area, choose "Assign Member Mentor(s)" in the Members tab of the Membership Management screen.
If you have been assigned special access to the Mentors area, you'll be able to access this directly from the Members Only menu when you are logged in.
Assigning mentors
Select the mentee from the list of members.
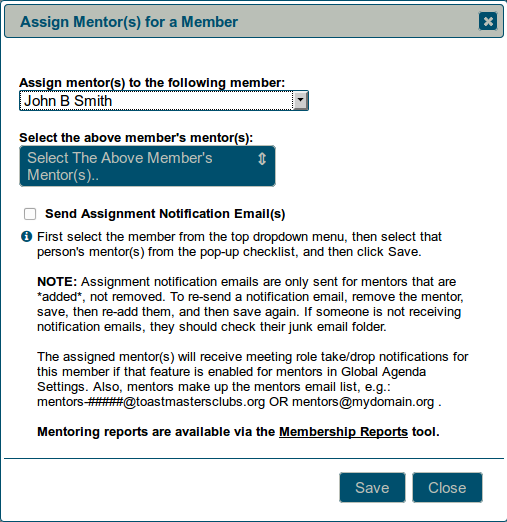
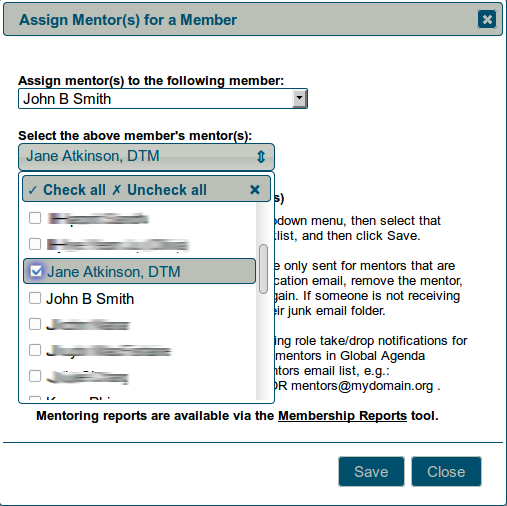
Select one or more mentors from the pull-down list.
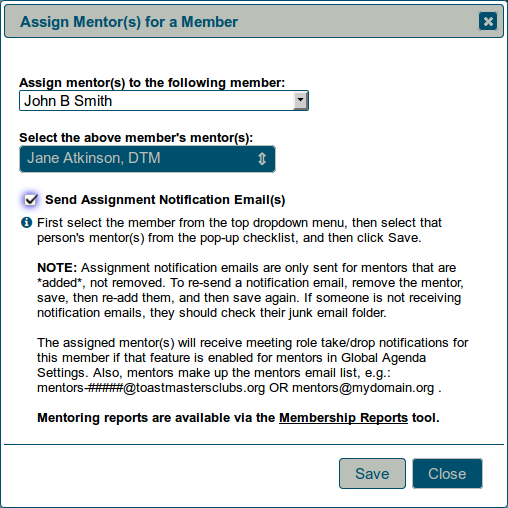
If you want to notify the mentee and mentor(s) of the new assignment, check the box before saving. Emails will automatically be sent to mentee and mentor(s) when you save.
Removing mentor assignments
After you have selected the mentee, click on the mentor pull-down list and remove the checkmark from one or more mentors. Save as usual.
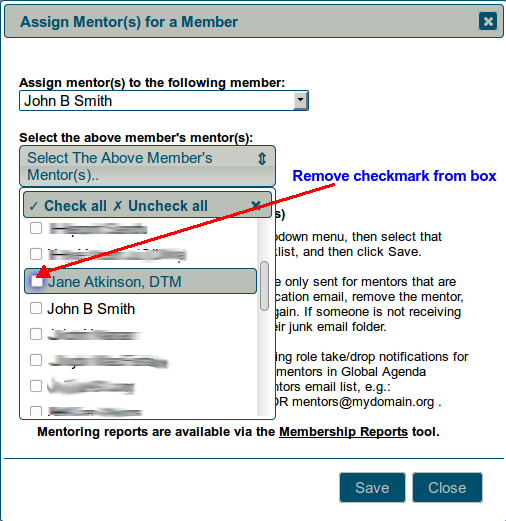
Note: Emails will not be sent when mentor assignments are being removed.

- Details
- Category: Documentation
- By Jane Atkinson
- Hits: 131
You can define your own groups for the purposes of sending email. For example, you could have a group of speech contest organisers or members who are planning to visit other clubs.
Your custom group members must all come from one of the main five pre-defined lists (i.e. members, guests, prospects, former members, club friends).
To create a new group, select which main list you wish the group members to come from. Then enter the group name in the field.
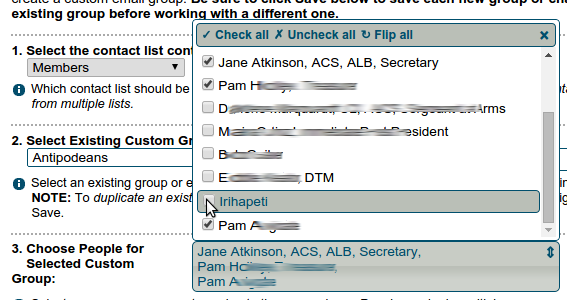
Add names to a group, using the pull-down menu and checking the desired names. Remember to save when you've finished.
An email address is automatically created for the group. It will be in the form
where "groupname" is the name of the group and nnnn stands for your club number.
For example, if the group is called "conference" and your club number is 999999, the email address will be
To delete a group
Select the group name, un-check all of its members, then click Save.
Who can send to a group
This depends on which of the built-in lists the custom group is made from.
If it was formed from the members list, then any member can send to it.
If it was formed from one of the other lists, then only officers may send email to it. It will also incorporate an "unsubscribe" feature so that people can opt out of receiving emails.
You can also create a group from the members, guests, prospects, former members, or club friends panels by selecting "create group" in the membership tools menu.
If you want the general public to be able to send to a custom group, it must have only one member in recipients list. See https://support.toastmastersclubs.org/doc/item/email-settings for further details.

- Details
- Category: Documentation
- By Jane Atkinson
- Hits: 234
After you add members, you will want to let them know what to do next. You can use our default welcome e-mail, or customize your own.
Click on the New Member Welcome tab to access this message.
Here is what the default looks like:
Hello {{membername}}:
Welcome to the {{clubname}} club website. The URL (web address) of this website is
{{WEBURL}}
You have been setup as a member of this website. As a member you can sign up for roles, update your profile including social media links, your photo, and other information, download member only files, sign up as a mentor or offer to mentor another member, and more.
To login, visit the club website and click the "Member Login" link under the "Members Only" section. If this is your first time logging in as a member, or if you forgot your password, you leave the password section blank and click the "Authorize / Login" button. You will be sent a login link via e-mail. Click that link, then you will be prompted to set up a custom password. This is a password that *you create*, it has not been assigned.
If you have any questions, let me know!
Thank you and enjoy our club website!
-----------------------------------
{{adminname}}
{{clubname}} Website Administrator
Notice the variables surrounded by the double braces {{}}. These are replaced with the value of the variable during the mailing process.
You can change the content of this message. If you want to discard your changes and start again, click on the "Reset Welcome Message to Default" button.
You can send the message to one or more members. Click on the "Select New Members to Welcome" button and check the names you wish to send to. Clicking on Save at the bottom of the panel will send the message.
You can test the email by sending one to yourself, to make sure that the variables work as expected.

- Details
- Category: Documentation
- By Jane Atkinson
- Hits: 5327
The Quick Add panel allows you to add more than one member, guest or prospect at a time.
Enter the person's name, email address and phone number (if desired) on a single line. There should be a space before and after the email address, but NOT in the phone number.
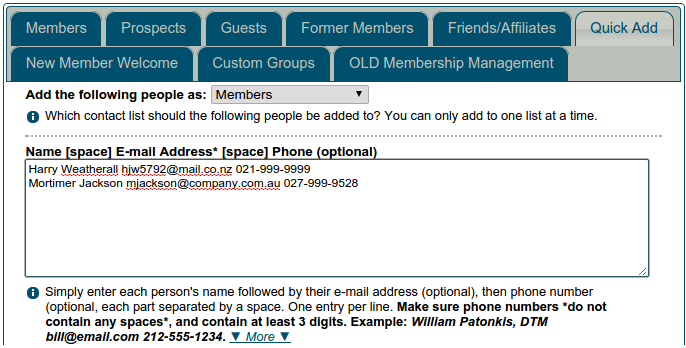
Names and educational qualifications may have spaces and commas, as needed.
The "_" (underscore) character can be used in multi-part names to indicate that the parts should be kept together. See the add members section in the main membership panel doc for further explanation.
More Articles …
Page 3 of 9


